Tutoriel N° 28a
Installation de RaspBian sur RaspBerryPi 3 modèle B
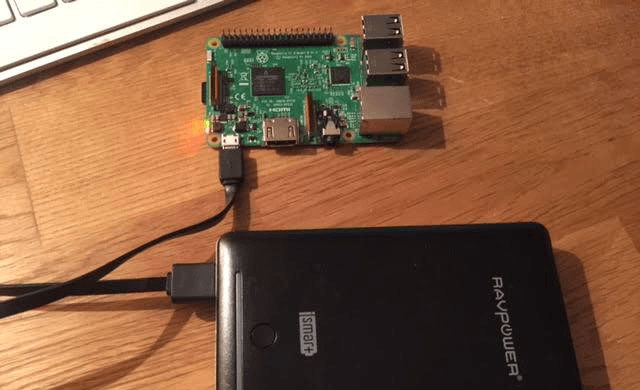
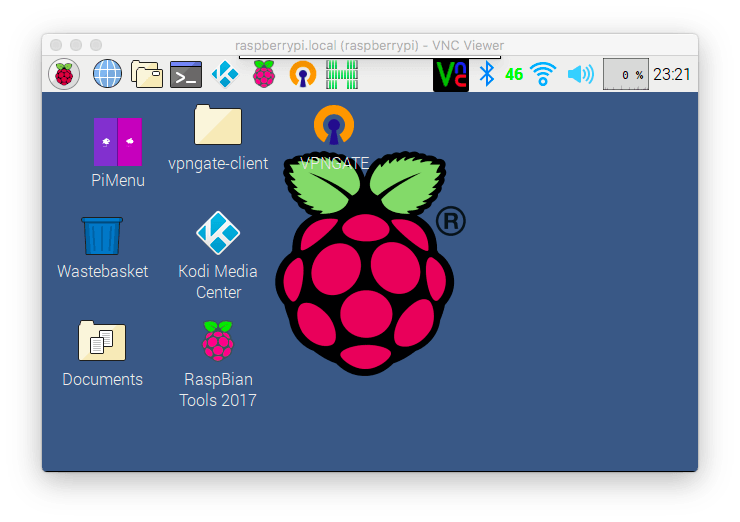
Je vous propose dans ce tutoriel l'installation complète de Raspbian sur RaspberryPI 3 modele B avec une souris bluetooth magic mouse, le wifi, le clavier français mac osx, le lecteur multimedia KODI, ainsi que le prise de contrôle via VNC.
SOMMAIRE
- RASPBIAN JESSIE WITH PIXEL
- INSTALLATION/BACKUP/RESTAURATION
- ACCES SSH
- ACCES VNC
- ACTIVATION WIFI
- CORRECTION CARACTERES DU CLAVIER MAC @#<>|
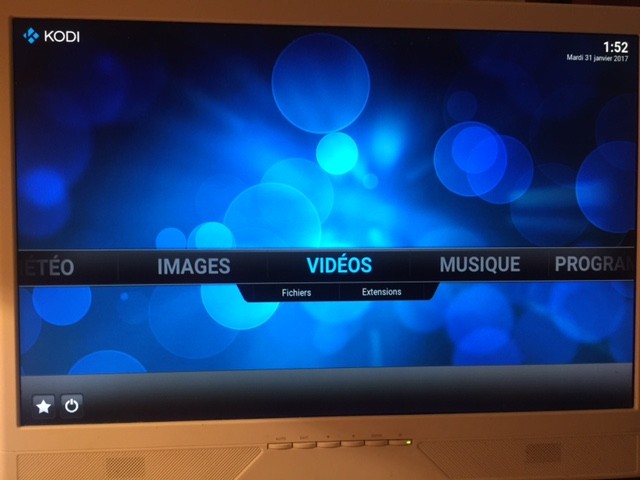
- INSTALLATION KODI (bug sortie écran noir corrigé)
- CREATION ICONE POUR LE BUREAU
- RESOLUTION ECRAN VNC, ECRAN EXTERNE OU ECRAN MAC
- SUPPRIMER LA MISE EN VEILLE
- SCRIPT DEMARRAGE CLAVIER
- ACTIVER FLASH CHROMIUM BROWSER
- INSTALLATION CLAVIER VIRTUEL
L'installation se fera à partir de Mac OSX Sierra, et il vous faudra donc une carte micro SD ainsi qu'un adaptateur micro SD/USB
On récupere ici l'ISO (à gauche)
https://www.raspberrypi.org/downloads/raspbian/
RASPBIAN JESSIE WITH PIXEL
INSTALLATION/BACKUP/RESTAURATION
1ere install
sudo diskutil unmount /dev/disk1s1
sudo diskutil eraseDisk FAT32 RASPBIAN MBRFormat /dev/disk1
sudo diskutil unmount /dev/disk1s1
sudo dd bs=1m if=/Users/souany/Desktop/2017-01-11-raspbian-jessie.img of=/dev/disk1
(618s)
Backup
sudo diskutil unmount /dev/disk1s1
sudo dd if=/dev/rdisk1 bs=1m | gzip > ~/Desktop/raspbian.gz
(1112s)
Restauration
sudo diskutil unmount /dev/disk1s1
sudo diskutil eraseDisk FAT32 RASPBIAN MBRFormat /dev/disk1
sudo diskutil unmount /dev/disk1s1
gzip -dc ~/Desktop/raspbian.gz | sudo dd of=/dev/rdisk1 bs=1m
(1813s) (1778s) (1891s)
PRISE EN MAIN
on branche ecran,clavier
avec clavier (touche ctrl + esc) => menu preferences > terminal
sudo raspi-config (clavier qwerty)
1 Expand FilesSystem
4 Internationalisation Options
I3 - Change Keyboard Layout
PC gérérique 105 touches (intl)
Français
Français - Français (Macintosh)
Disposition par défaut pour le clavier
Pas de touche "compose"
No
I4 - Change Wi-fi country (FR)
7 Advanced Options
A3 Memory Split (256)
A4 SSH (Enable)
A5 VNC (Enable)
AA 1-Wire (Enable)
Finish & reboot
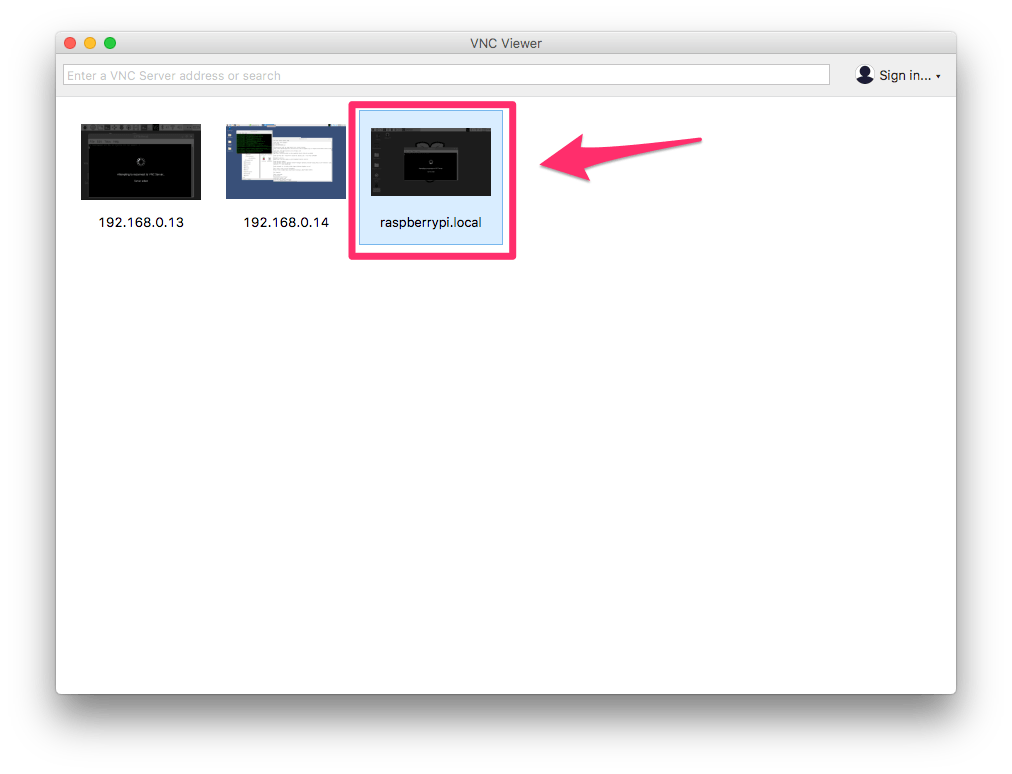
On install VNC Viewer sur MAC OS SIERRA
https://www.realvnc.com/download/viewer/macosx/
raspberrypi.local
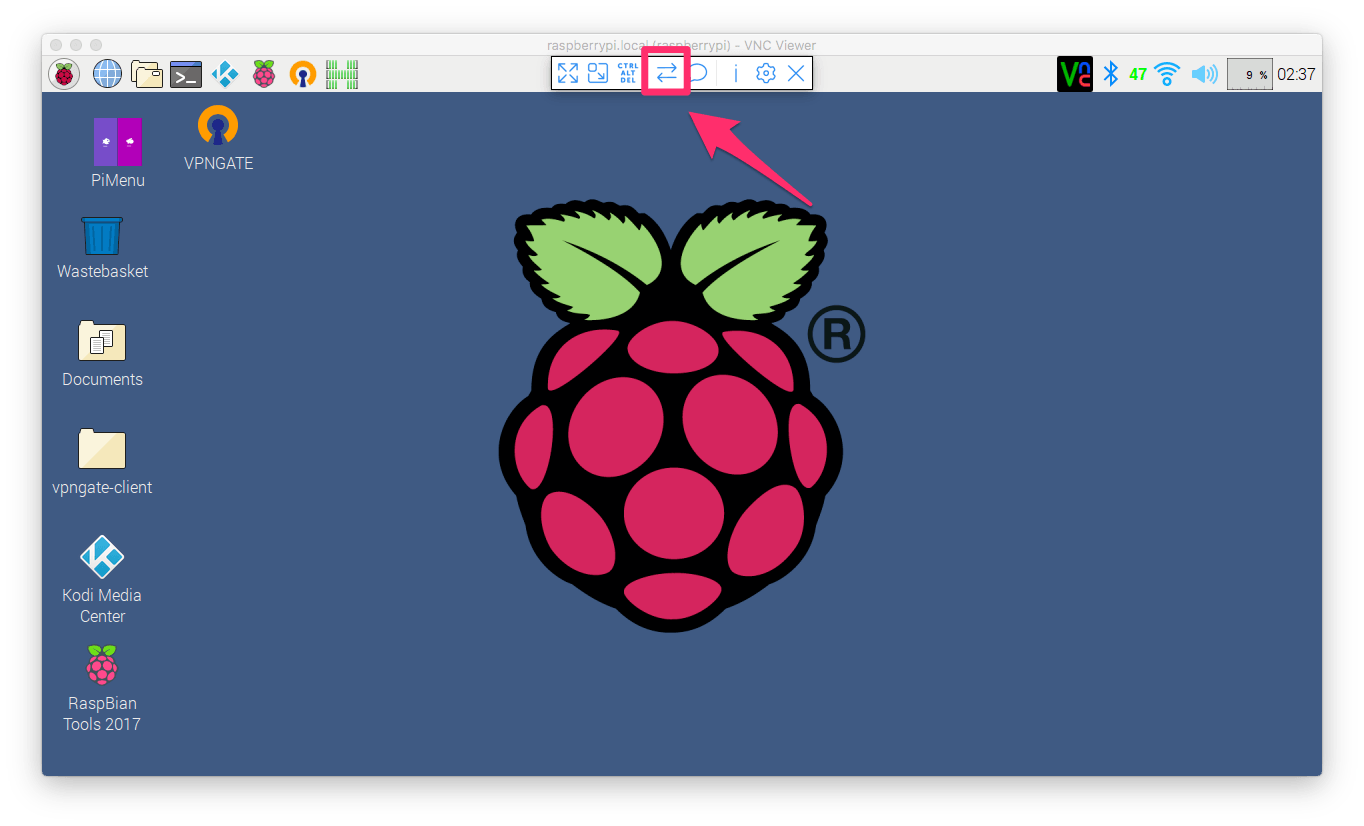
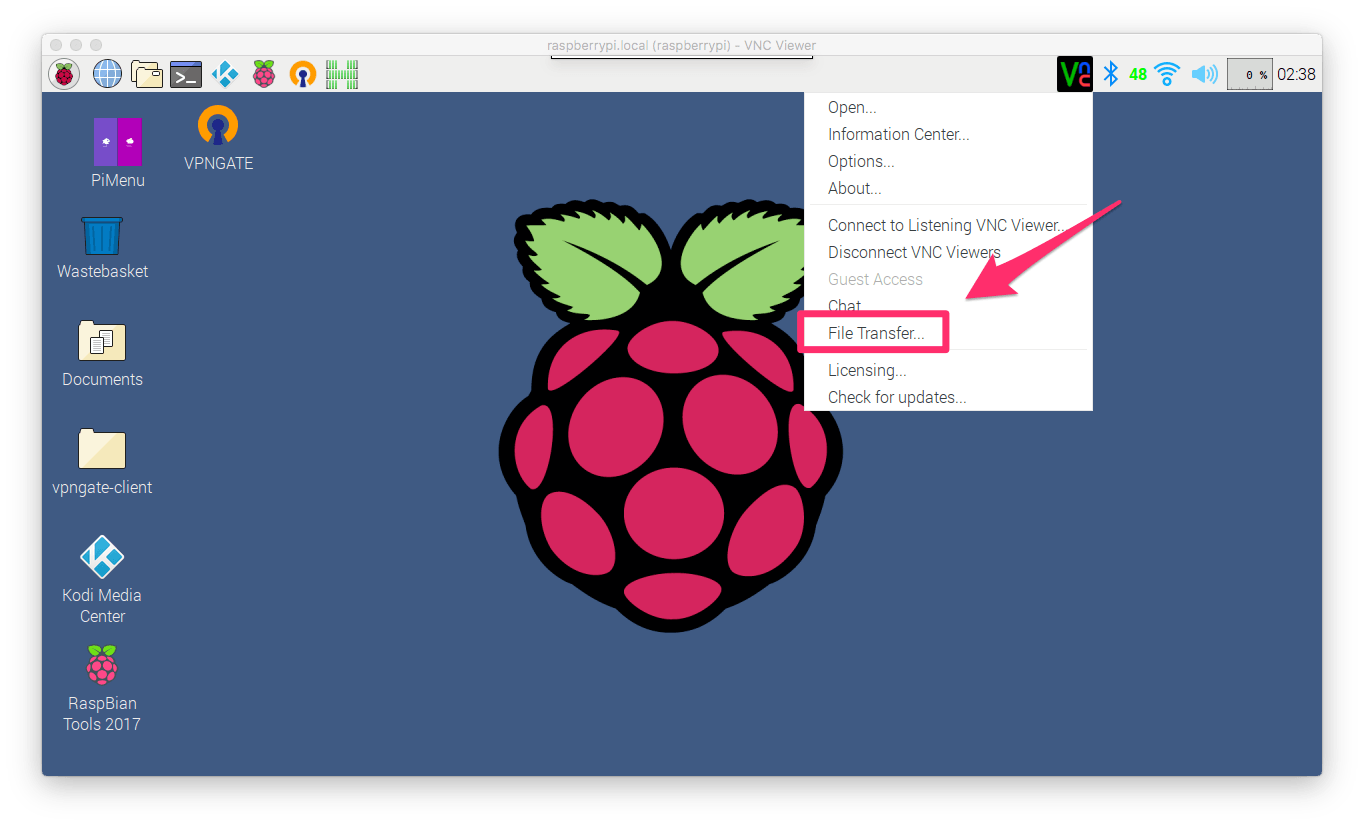
Transfert de fichier avec VNC
Mac vers Pi
Pi vers Mac (clic droit sur icone VNC viewer)
on branche cable reseau
on lance vnc > on saisit raspberrypi.local à la place d l'ip
login: pi
mdp: raspberry
ACCES SSH
sur votre mac dans un terminal
ssh -l pi raspberrypi.local
en haut à droite icone bluetooth
add device
on eteind et rallume souris (pour déclancher le signal) et on pair la souris bluetooth
icone reseau en haut à droite
freebox_wifi
mot_de_passe
on debranche cable reseau quand le wifi est connecté
ifconfig
192.168.0.13 (on recup l'adresse IP)
On change le mot de passe du user pi (avec lxterminal)
passwd pi
mot_de_passe
PARTAGE de fichiers/répertoires avec VNC (icônes double flèche en haut)
---------------------------------------------------------------------------------------
CORRECTION CARACTERES DU CLAVIER MAC @#<>|
cd /home/pi
nano mychanges
keycode 46 = l L l L bar bar bar
keycode 49 = less greater less greater VoidSymbol VoidSymbol VoidSymbol
keycode 60 = colon slash colon slash division backslash division
keycode 64 = Alt_L Meta_L Alt_L Meta_L Alt_L Meta_L
keycode 94 = at numbersign at numbersign periodcentered Ydiaeresis periodcentered
keycode 49 = less greater less greater VoidSymbol VoidSymbol VoidSymbol
keycode 60 = colon slash colon slash division backslash division
keycode 64 = Alt_L Meta_L Alt_L Meta_L Alt_L Meta_L
keycode 94 = at numbersign at numbersign periodcentered Ydiaeresis periodcentered
nano sloading.sh
#!/bin/bash
setxkbmap -option;
xmodmap mychanges;
setxkbmap -option;
xmodmap mychanges;
sh mychanges
clic droit > desktop preferences
on change wallpaper
onglet Icons
on coche Show "Documents" folder on the desktop
on coche Show connected volumes on the desktop
ensuite on coche dans advanced
Show menus provided by window manager when desktop is clicked
ON REND LE USER pi super utilisateur sans ajouter le mot de passe à sudo
sudo nano /etc/sudoers
on ajoute
pi ALL=NOPASSWD:ALL
---------------------------------------------------------------------------------------
INSTALLATION KODI (bug sortie écran noir corrigé)
sudo nano /etc/apt/sources.list.d/raspi.list
#(kody17 krypton)
deb http://archive.mene.za.net/raspbian jessie contrib unstable
deb http://archive.mene.za.net/raspbian jessie contrib unstable
sudo apt-key adv --keyserver keyserver.ubuntu.com --recv-key 5243CDED
on installe
- preload (accelere chargement page web)
- htop (affiche processus)
- dialog (necessaire pour menu)
- slurm (trafic réseau)
- numlockx (active pavé numérique)
- synaptic (gestionnaire de package)
- locate (pour utiliser update db, faire une recherche avec locate)
- kodi (programme kodi)
- florence (clavier virtuel)
sudo apt-get update
sudo apt-get install preload dialog htop slurm numlockx synaptic locate kodi florence at-spi2-core : virtual keyboard -y
numlockx ==> dans graphique
sudo usermod -a -G audio,video,input,dialout,plugdev,tty pi
sudo nano /etc/udev/rules.d/99-input.rules
SUBSYSTEM=="input", GROUP="input", MODE="0660"
KERNEL=="tty[0-9]*", GROUP="tty", MODE="0660"
KERNEL=="tty[0-9]*", GROUP="tty", MODE="0660"
puis (pour creer script lancement)
cd /home/pi
nano startkodi
#!/bin/bash
fbset_bin=`which fbset`
xset_bin=`which xset`
xrefresh_bin=`which xrefresh`
if [ ! -z $fbset_bin ]; then
DEPTH2=`$fbset_bin | head -3 | tail -1 | cut -d " " -f 10`
fi
kodi "$@"
if [ ! -z $fbset_bin ]; then
if [ "$DEPTH2" == "8" ]; then
DEPTH1=16
else
DEPTH1=8
fi
$fbset_bin -depth $DEPTH1 > /dev/null 2>&1
$fbset_bin -depth $DEPTH2 > /dev/null 2>&1
fi
if [ ! -z $xset_bin ] && [ ! -z $xrefresh_bin ]; then
if [ -z $DISPLAY ]; then
DISPLAY=":0"
fi
$xset_bin -display $DISPLAY -q > /dev/null 2>&1
if [ "$?" == "0" ]; then
$xrefresh_bin -display $DISPLAY > /dev/null 2>&1
fi
fi
VT="$(fgconsole)"
if [ "$VT" ]; then
sudo chvt 7
sudo chvt "$VT"
fi
sudo chmod +x startkodi
sudo cp startkodi /usr/local/bin
sudo chmod 777 /usr/local/bin/startkodi
nano /home/pi/Desktop/kodi.desktop
[Desktop Entry]
Version=1.0
Name=Kodi Media Center
GenericName=Media Center
Comment=Manage and view your media
Exec=sudo startkodi
Icon=kodi
Terminal=false
Type=Application
Categories=AudioVideo;Video;Player;TV;
Version=1.0
Name=Kodi Media Center
GenericName=Media Center
Comment=Manage and view your media
Exec=sudo startkodi
Icon=kodi
Terminal=false
Type=Application
Categories=AudioVideo;Video;Player;TV;
sudo rm /usr/share/applications/kodi.desktop
sudo cp Desktop/kodi.desktop /usr/share/applications
sudo usermod -a -G "audio,video,input,dialout,plugdev,tty" pi
sudo addgroup --system input
sudo nano /etc/udev/rules.d/99-input.rules
SUBSYSTEM==input, GROUP=input, MODE=0660
KERNEL==tty[0-9]*, GROUP=tty, MODE=0660
KERNEL==tty[0-9]*, GROUP=tty, MODE=0660
sudo nano /etc/udev/rules.d/10-permissions.rules
# input
KERNEL=="mouse*|mice|event*", MODE="0660", GROUP="input"
KERNEL=="ts[0-9]*|uinput", MODE="0660", GROUP="input"
KERNEL==js[0-9]*, MODE=0660, GROUP=input
# tty
KERNEL==tty[0-9]*, MODE=0666
# vchiq
SUBSYSTEM==vchiq, GROUP=video, MODE=0660
KERNEL=="mouse*|mice|event*", MODE="0660", GROUP="input"
KERNEL=="ts[0-9]*|uinput", MODE="0660", GROUP="input"
KERNEL==js[0-9]*, MODE=0660, GROUP=input
# tty
KERNEL==tty[0-9]*, MODE=0666
# vchiq
SUBSYSTEM==vchiq, GROUP=video, MODE=0660
sudo chmod 0777 /dev/tty0
reboot
on lance kodi avec ls icônes ou en tapant sudo startkodi
remarque: kodi ne fonctionne qu'avec un écran externe en HDMI, vnc ne gère pas kodi
---------------------------------------------------------------------------------------
RESOLUTION ECRAN VNC, ECRAN EXTERNE OU ECRAN MAC
je conseille le client real vnc viewer sur mac, pc et mobile, cela permet le controle de la souris
le package florence permet la saisie avec un clavier virtuel
On va modifier le script config.txt et créer un script menu
cd /boot
sudo cp config.txt config.old && sudo cp config.txt config24.old && sudo cp config.txt configmac.old && sudo cp configmac.old config19001200.old
sudo nano configmac.old
# j'ajoute pour 1900x1200 externe
hdmi_ignore_edid=0xa5000080
hdmi_group=2
#1280x780
hdmi_mode=85
# liste complète dans le fichier config.txt
#hdmi_mode=9 800×600
#hdmi_mode=16 1024×768
#hdmi_mode=23 1280×768
#hdmi_mode=28 1280×800
#hdmi_mode=35 1280×1024
#hdmi_mode=51 1600×1200
#hdmi_mode=69 1920×1200
hdmi_ignore_edid=0xa5000080
hdmi_group=2
#1280x780
hdmi_mode=85
# liste complète dans le fichier config.txt
#hdmi_mode=9 800×600
#hdmi_mode=16 1024×768
#hdmi_mode=23 1280×768
#hdmi_mode=28 1280×800
#hdmi_mode=35 1280×1024
#hdmi_mode=51 1600×1200
#hdmi_mode=69 1920×1200
sudo nano configmac.old
# j'ajoute pour 1900x1200 externe
hdmi_ignore_edid=0xa5000080
hdmi_group=2
#1900x1200
hdmi_mode=69
# liste complète dans le fichier config.txt
#hdmi_mode=9 800×600
#hdmi_mode=16 1024×768
#hdmi_mode=23 1280×768
#hdmi_mode=28 1280×800
#hdmi_mode=35 1280×1024
#hdmi_mode=51 1600×1200
#hdmi_mode=69 1920×1200
hdmi_ignore_edid=0xa5000080
hdmi_group=2
#1900x1200
hdmi_mode=69
# liste complète dans le fichier config.txt
#hdmi_mode=9 800×600
#hdmi_mode=16 1024×768
#hdmi_mode=23 1280×768
#hdmi_mode=28 1280×800
#hdmi_mode=35 1280×1024
#hdmi_mode=51 1600×1200
#hdmi_mode=69 1920×1200
---------------------------------------------------------------------------------------
cd /home/pi
nano menu
#!/bin/bash
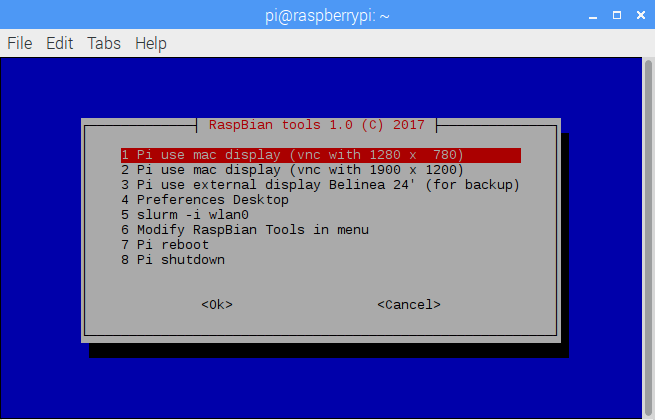
OPTION=$(whiptail --title "RaspBian tools 1.0 (C) 2017" --menu "Choose your option" 15 60 8
"1" "Pi use mac display (vnc with 1280 x 780)"
"2" "Pi use mac display (vnc with 1900 x 1200)"
"3" "Pi use external display Belinea 24' (for backup)"
"4" "Preferences Desktop"
"5" "slurm -i wlan0"
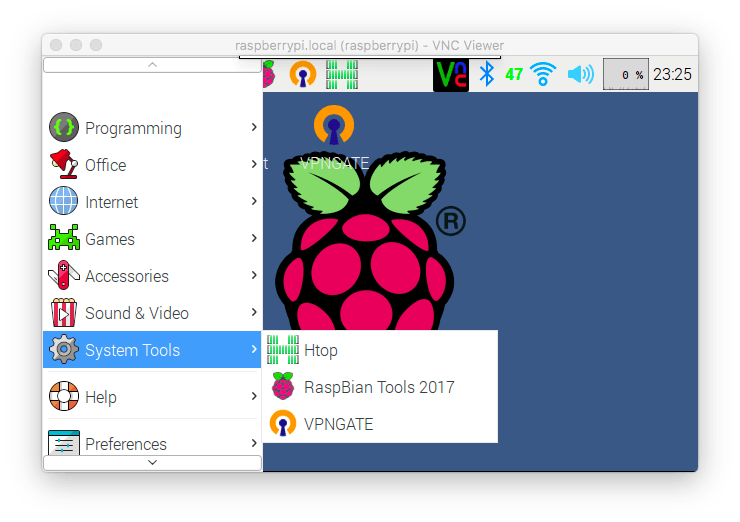
"6" "Modify RaspBian Tools in menu"
"7" "Pi reboot"
"8" "Pi shutdown" 3>&1 1>&2 2>&3)
exitstatus=$?
if [ $exitstatus = 0 ]; then
if [ $OPTION = 1 ]; then
clear
echo "Pi use mac display (vnc with 1280x780)"
echo "Reboot in 5s or [ctrl C] to Abort !"
sudo cp /boot/configmac.old /boot/config.txt
i=5
while [ $i -ge 0 ] ; do
echo "$i"
i=$(($i - 1))
sleep 1;
done
reboot
fi
if [ $OPTION = 2 ]; then
clear
echo "Pi use mac display (vnc with 1900x1200)"
echo "Reboot in 5s or [ctrl C] to Abort !"
sudo cp /boot/config19001200.old /boot/config.txt
i=5
while [ $i -ge 0 ] ; do
echo "$i"
i=$(($i - 1))
sleep 1;
done
reboot
fi
if [ $OPTION = 3 ]; then
clear
echo "Pi use external display Belinea 24' (for backup)"
echo "Reboot in 5s or [ctrl C] to Abort !"
i=5
while [ $i -ge 0 ] ; do
echo "$i"
i=$(($i - 1))
sleep 1;
done
sudo cp /boot/config24.old /boot/config.txt
reboot
fi
if [ $OPTION = 4 ]; then
pcmanfm --desktop-pref
fi
if [ $OPTION = 5 ]; then
slurm -i wlan0
fi
if [ $OPTION = 6 ]; then
sudo cp menu /usr/local/bin
sudo chmod 777 /usr/local/bin/menu
fi
if [ $OPTION = 7 ]; then
clear
echo "Pi Reboot in 5s or [ctrl C] to Abort !"
i=5
while [ $i -ge 0 ] ; do
echo "$i"
i=$(($i - 1))
sleep 1;
done
sudo reboot
fi
if [ $OPTION = 8 ]; then
clear
echo "Pi Shutdown in 5s or [ctrl C] to Abort !"
i=5
while [ $i -ge 0 ] ; do
echo "$i"
i=$(($i - 1))
sleep 1;
done
sudo poweroff
fi
else
echo "You chose Cancel."
fi
chmod 777 menu
sudo cp menu /usr/local/bin | sudo chmod 777 /usr/local/bin/menu
SCRIPT menu
on tape menu pour l'appeler
1 > choisir cette option pour avoir VNC avec une résolution de 1280x780 (sans écran externe brancher en HDMI)
2 > choisir cette option si vous avez un ecran externe en HDMI 1900X1200
3 > affiche la temperature du CPU
4 > affiche les préférences du bureau qui ont disparues de Raspbian
5 > affiche l'activité réseau
6 > si vous modifier le script menu (propagation) dans le menu)
7 > reboot de la PI
8 > eteindre la pi
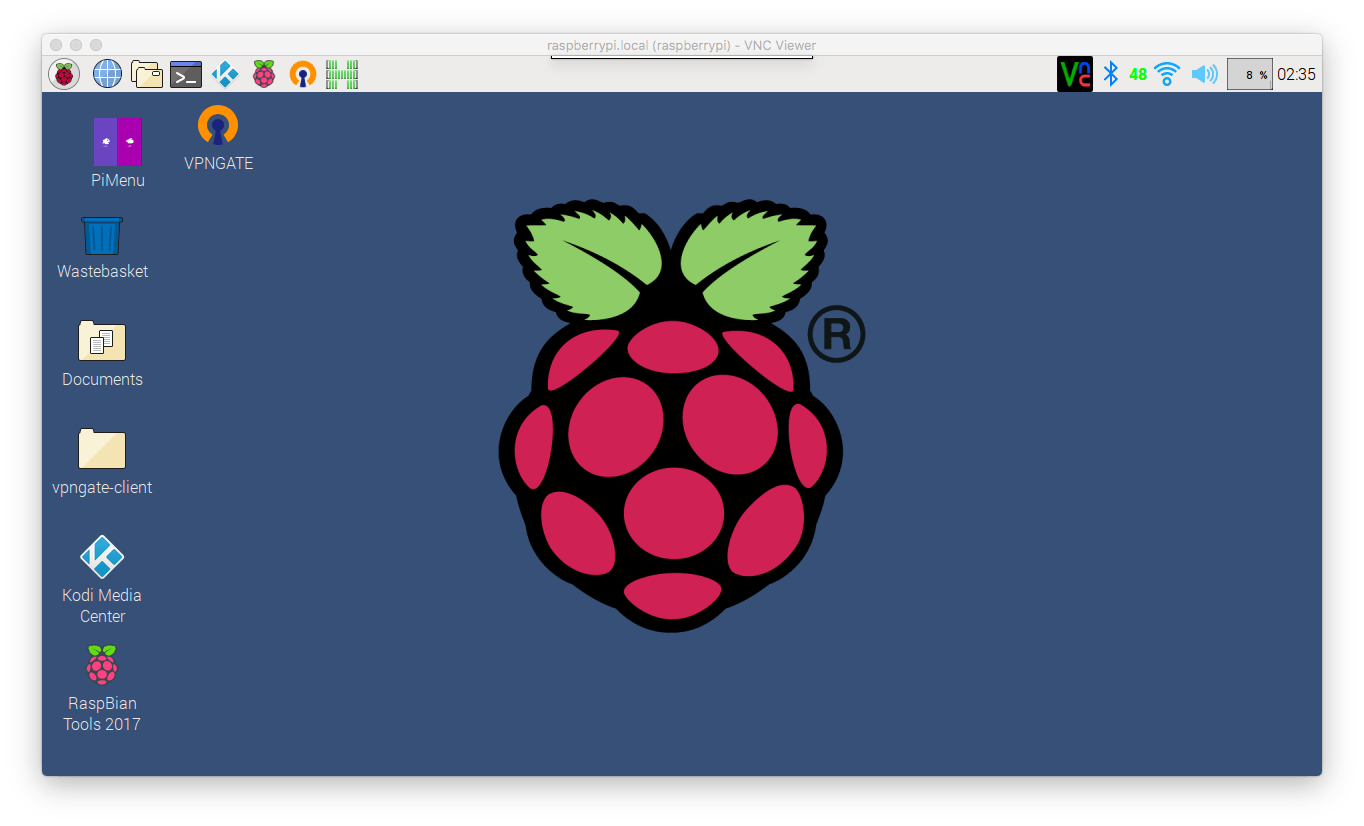
[VNC - 1280x780]
CREATION ICONE POUR LE BUREAU
Vous devez récuperer une icône et la placer dans /home/pi et la nommer Raspberry-Pi-48.png
https://icons8.com/web-app/for/all/Raspberry-Pi
/home/pi/Raspberry-Pi-48.png
cd /home/pi/Desktop
nano menu-menu.desktop
[Desktop Entry]
Version=1.0
Name=RaspBian Tools 2017
GenericName=RasBian Tools
Comment=Manage raspbian
Exec=/home/pi/menu
Icon=/home/pi/Raspberry-Pi-48.png
Terminal=true
Type=Application
Categories=System;
Version=1.0
Name=RaspBian Tools 2017
GenericName=RasBian Tools
Comment=Manage raspbian
Exec=/home/pi/menu
Icon=/home/pi/Raspberry-Pi-48.png
Terminal=true
Type=Application
Categories=System;
cd /home/pi/Desktop
xdg-desktop-menu install menu-menu.desktop
cd /home/pi
sudo cp Desktop/menu-menu.desktop /usr/share/applications
barre menu
on va ajouter 3 boutons: kodi, menu, et htop
sudo nano /home/pi/.config/lxpanel/LXDE-pi/panels/panel
on ajoute au bon emplacement
Button {
id=/usr/share/applications/kodi.desktop
}
Button {
id=/usr/share/applications/menu-menu.desktop
}
Button {
id=/usr/share/applications/htop.desktop
}
id=/usr/share/applications/kodi.desktop
}
Button {
id=/usr/share/applications/menu-menu.desktop
}
Button {
id=/usr/share/applications/htop.desktop
}
MISE A JOUR BASE DE DONNEES DE RECHERCHES
sudo updatedb
SCRIPT DEMARRAGE CLAVIER
cd /home/pi
nano .bashrc
sh /home/pi/sloading.sh
chmod +x sloading.sh
SUPPRIMER LA MISE EN VEILLE
sudo nano /etc/lightdm/lightdm.conf
Cherchez la section [SeatDefaults], repérez la ligne
#xserver-command=X
remplacer par
xserver-command=X -s 0 -dpms
MOT DE PASSE ROOT
sudo su
passwd root
mot_de_passe
ACTIVER FLASH CHROMIUM BROWSER
activer flash chromium
dans le browser:
chrome://plugins
cocher > Always akkowedd to run
#pour installer Adobe flash player 24
#sudo apt-get update
#sudo apt-get install rpi-chromium-mods
#sudo apt-get remove rpi-chromium-mods

